Learn · Setup guides
Connect Calendly API to Outloop
Last updated:
In short
Connect the Calendly API without exposing your token to your agents.
Outloop lets your agents use approved Calendly API access through a secure local bridge. You create a Calendly personal access token, choose its scopes, and store it in Outloop — the token stays in your local secret store, and agents call the Calendly API through Outloop without ever seeing the raw token.
What this setup gives you
Agents that need Calendly access — to read your account, list event types, or create a scheduling link —
usually get a raw token pasted into a tool, a chat, or a
.env file. With Outloop, the personal access
token stays in your local secret store (macOS Keychain) and the agent requests the action through the
API Bridge instead, so it never sees the raw token. The credential is used on the wire host-side; the
agent uses its capability without ever seeing its value.
.env files, project folders,
or generated artifacts. The token's only destination is the Outloop API key field.
What you need before starting
- ✓A Calendly account with access to Integrations & apps.
- ✓Permission to create a personal access token (admin tokens grant organization-wide access).
- ✓Outloop installed locally.
- ✓A client workspace connected in Outloop.
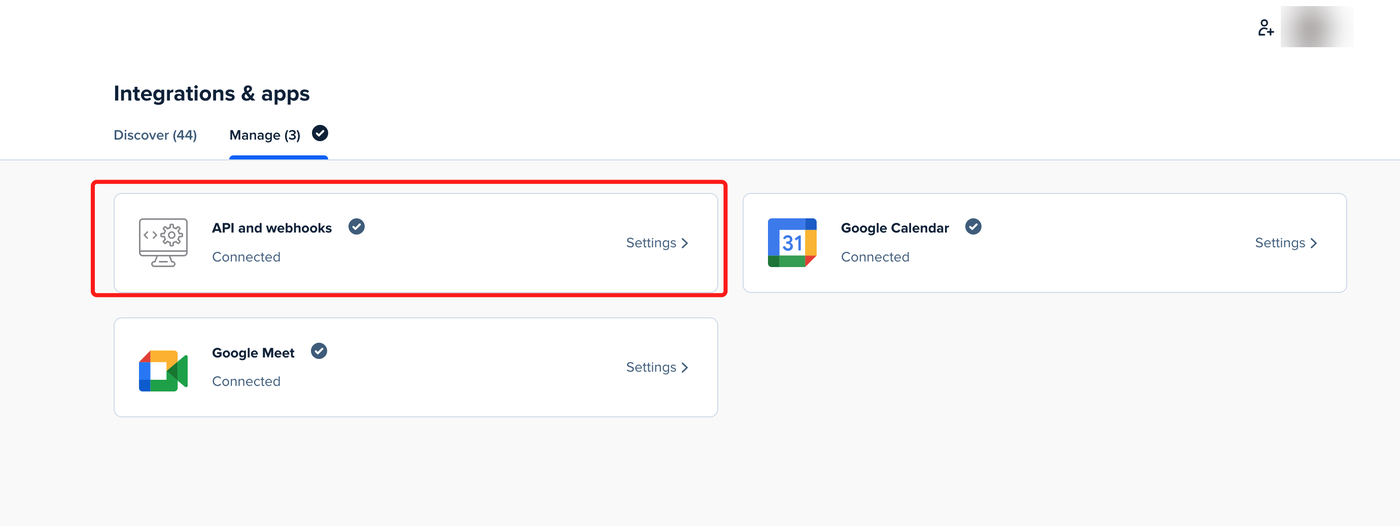
1. Open Integrations & apps → API
In Calendly, open Integrations & apps from the left sidebar.
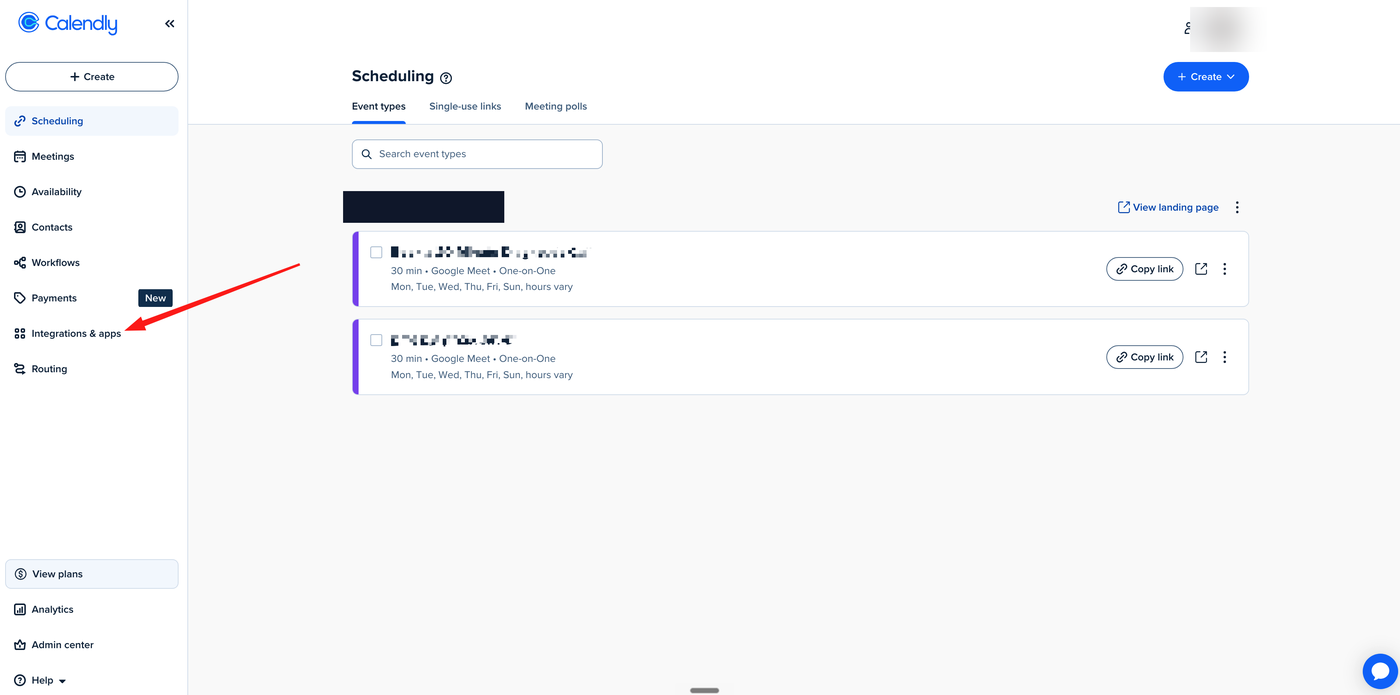
Switch to the Manage tab and open the API and webhooks card.
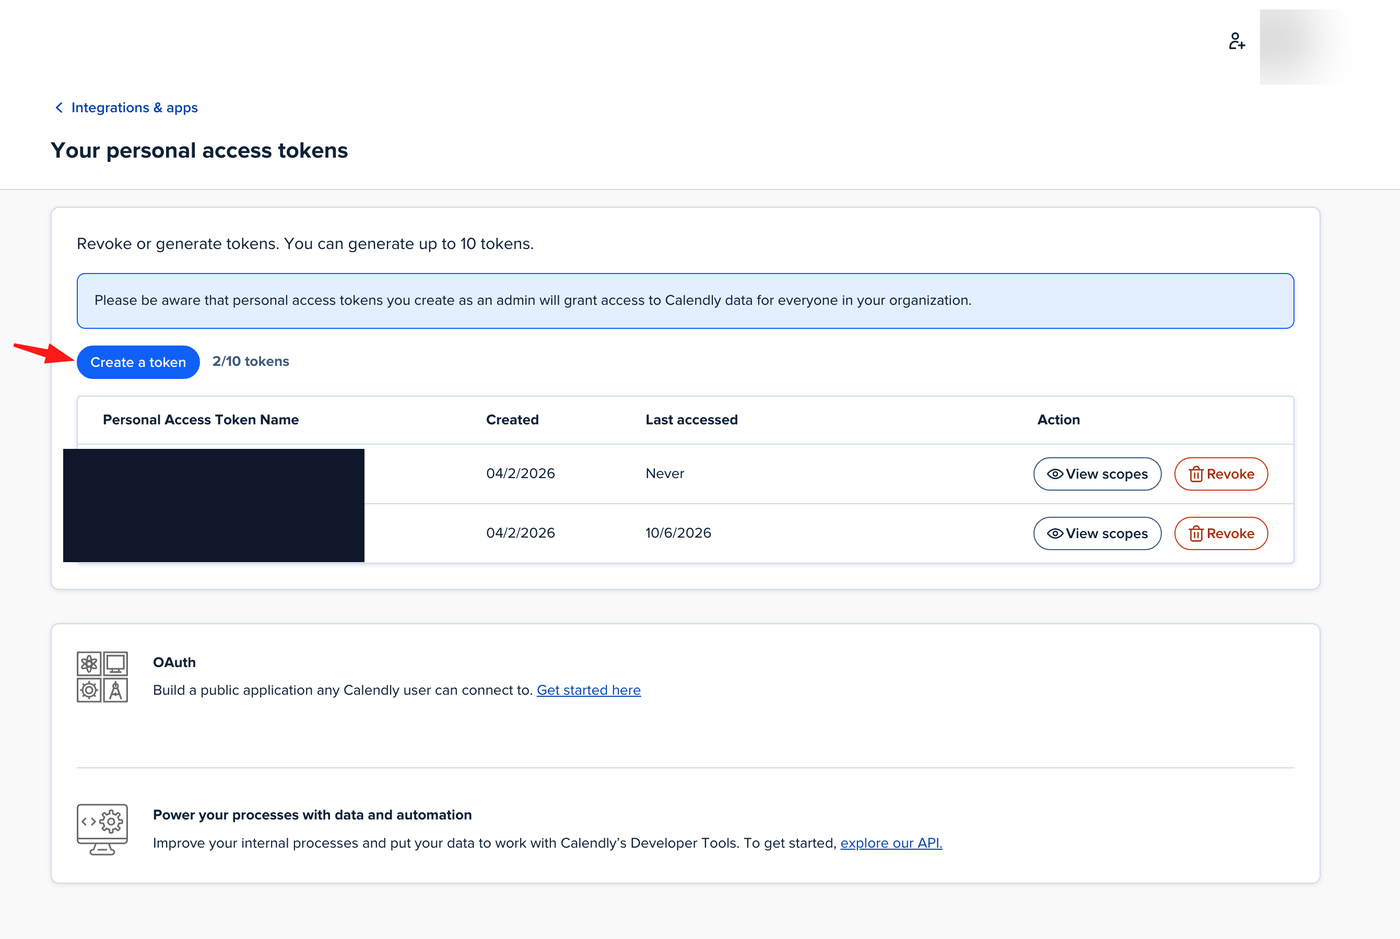
2. Create a personal access token
On Your personal access tokens, click Create a token. You can generate up to ten tokens.
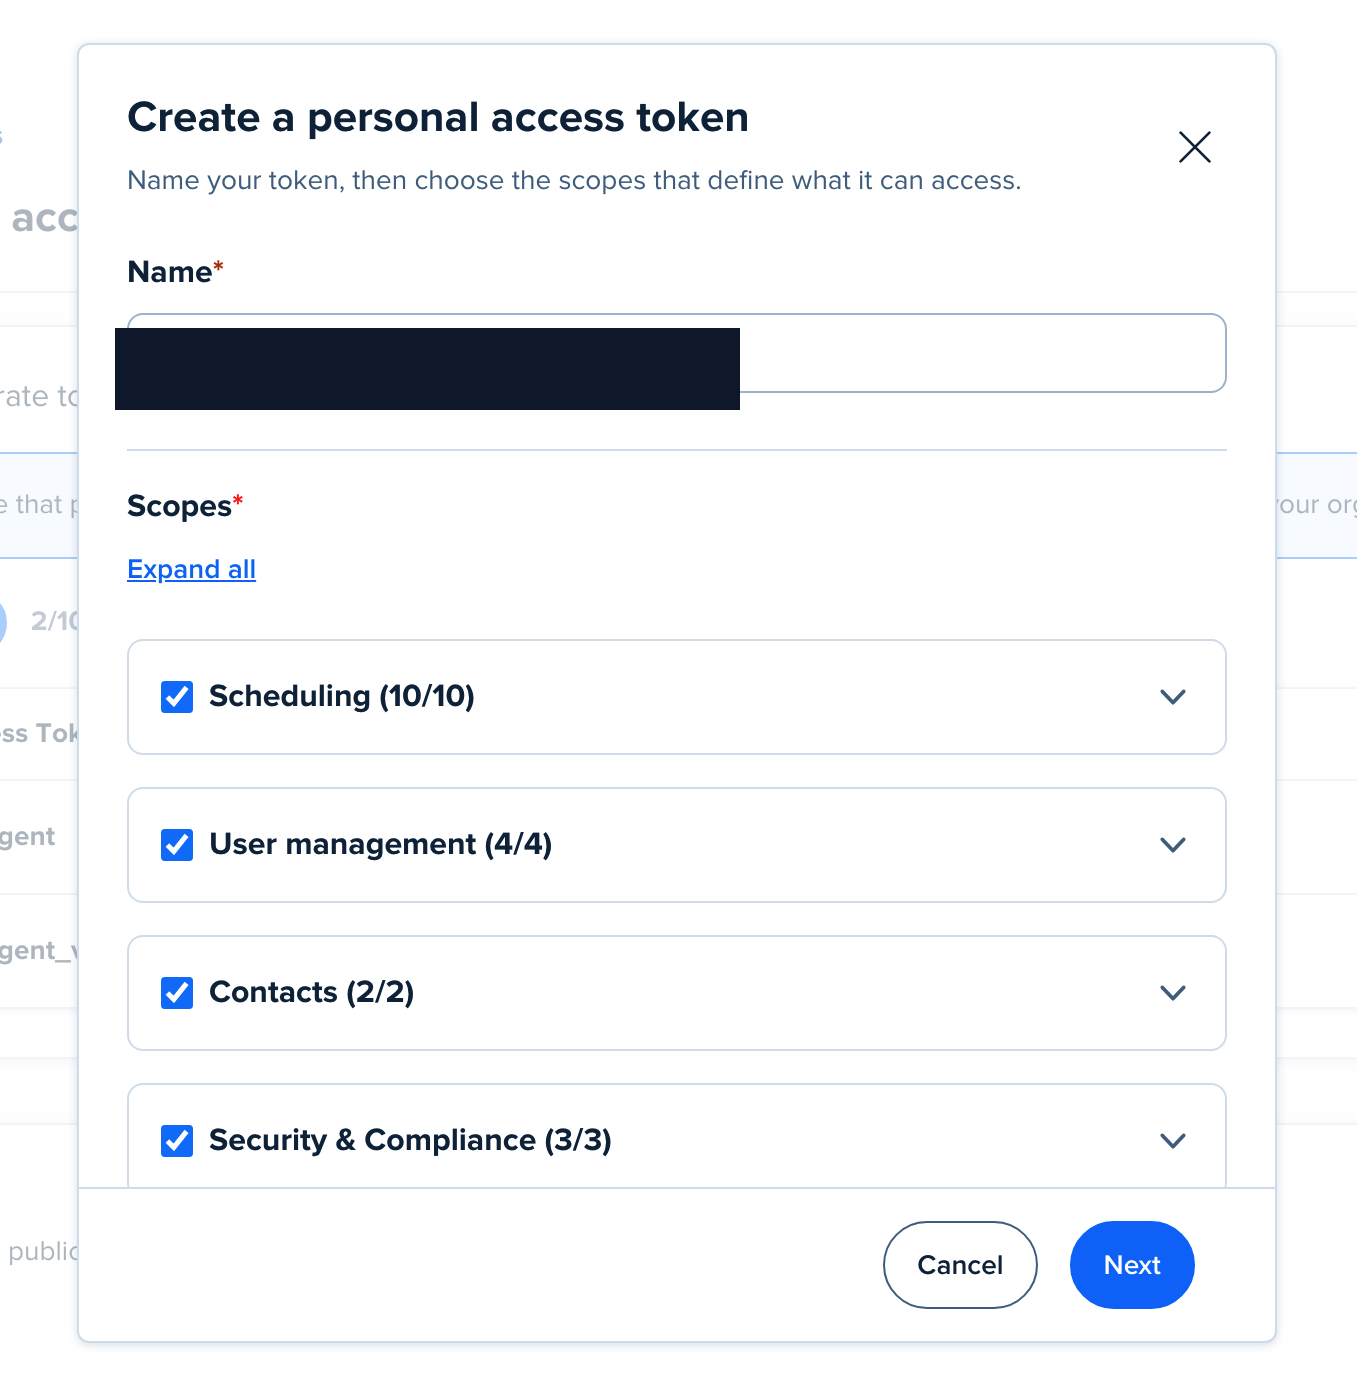
3. Name the token and choose scopes
Give the token an identifiable name — a good convention is to match the name Outloop suggests, so the same key is easy to recognize on both sides. Then choose the scopes that define what the token can access. Selecting all scopes gives the broadest access; for a read-only proof you only need read scopes.
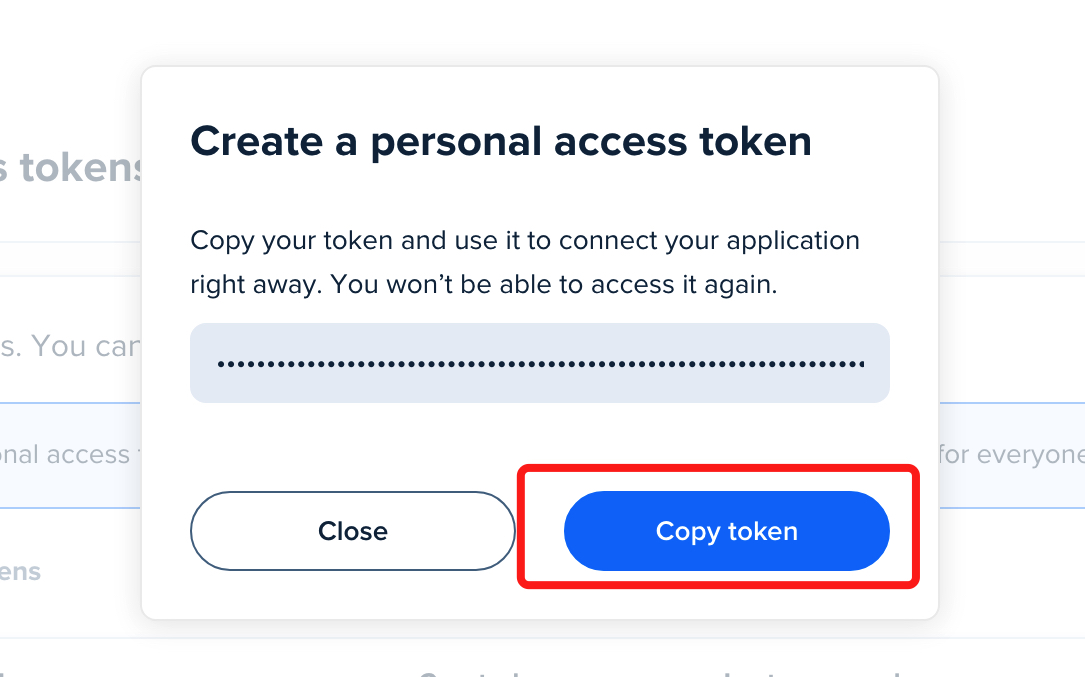
4. Copy the token
Calendly shows the token once. Click Copy token and keep it on the clipboard — you will paste it into Outloop in a moment, not into any file or chat.
5. Add the Calendly key in Outloop
In Outloop, open Add an API key, choose
Calendly as the service, and pick the client workspace that
should get access. Outloop suggests a key name — copy it so you can name the key the same on both sides.
Adding the key configures the bounded API bridge to https://api.calendly.com
with the documented auth, and the agent never sees the key.
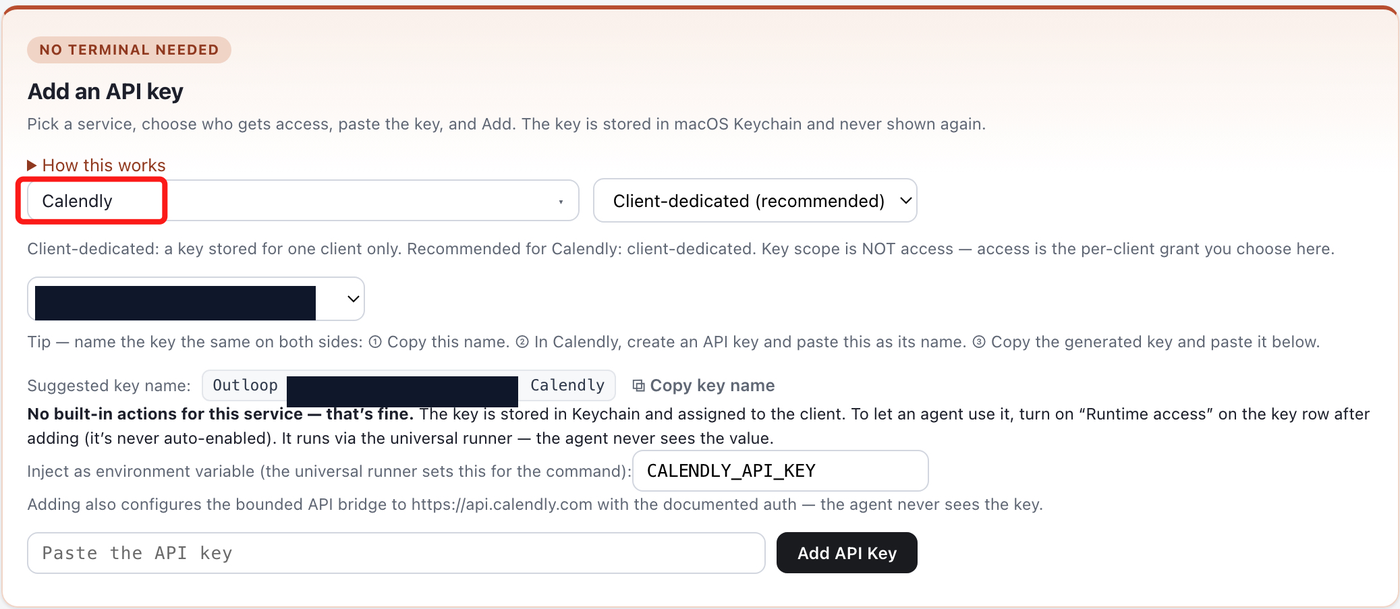
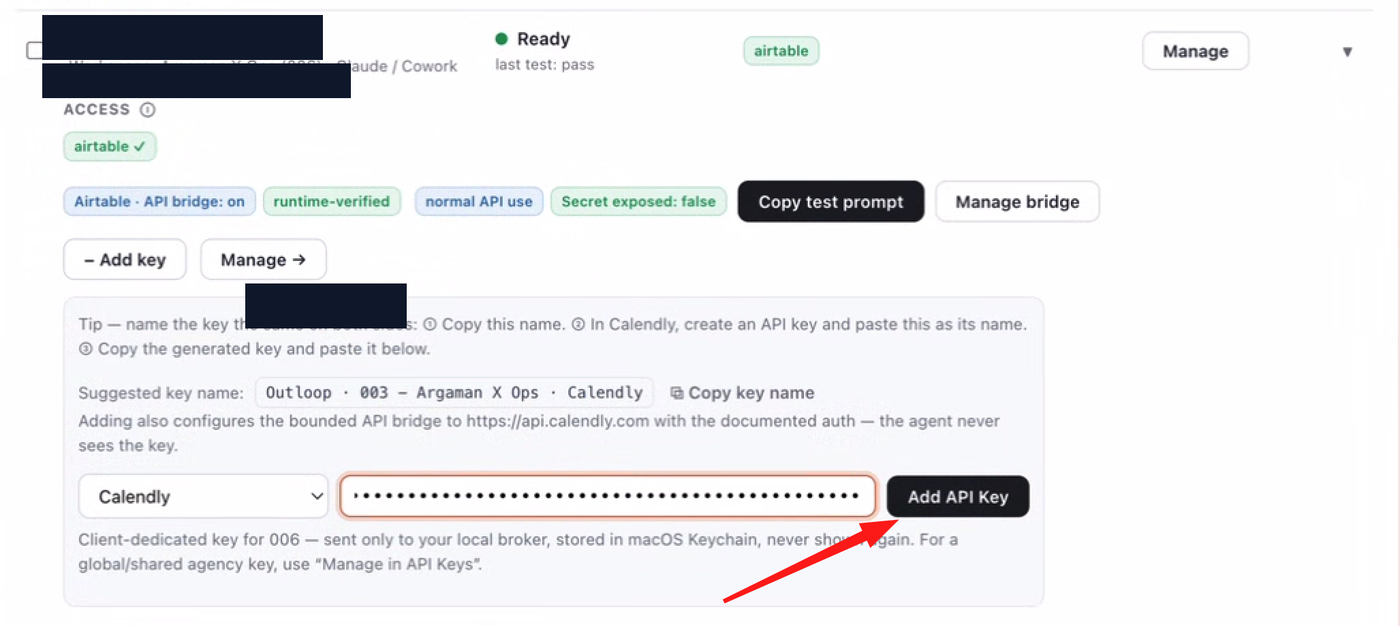
6. Paste the token and add the key
Paste the Calendly token into the API key field and click Add API Key. Outloop stores it in macOS Keychain for that client workspace and never shows it again. To let an agent use it, turn on Runtime access on the key row after adding — it is never auto-enabled.
7. First safe proof (read-only)
Always prove access with a read first. Copy the test prompt from the Calendly key row and run it in your agent. The safe proof calls:
GET /users/me
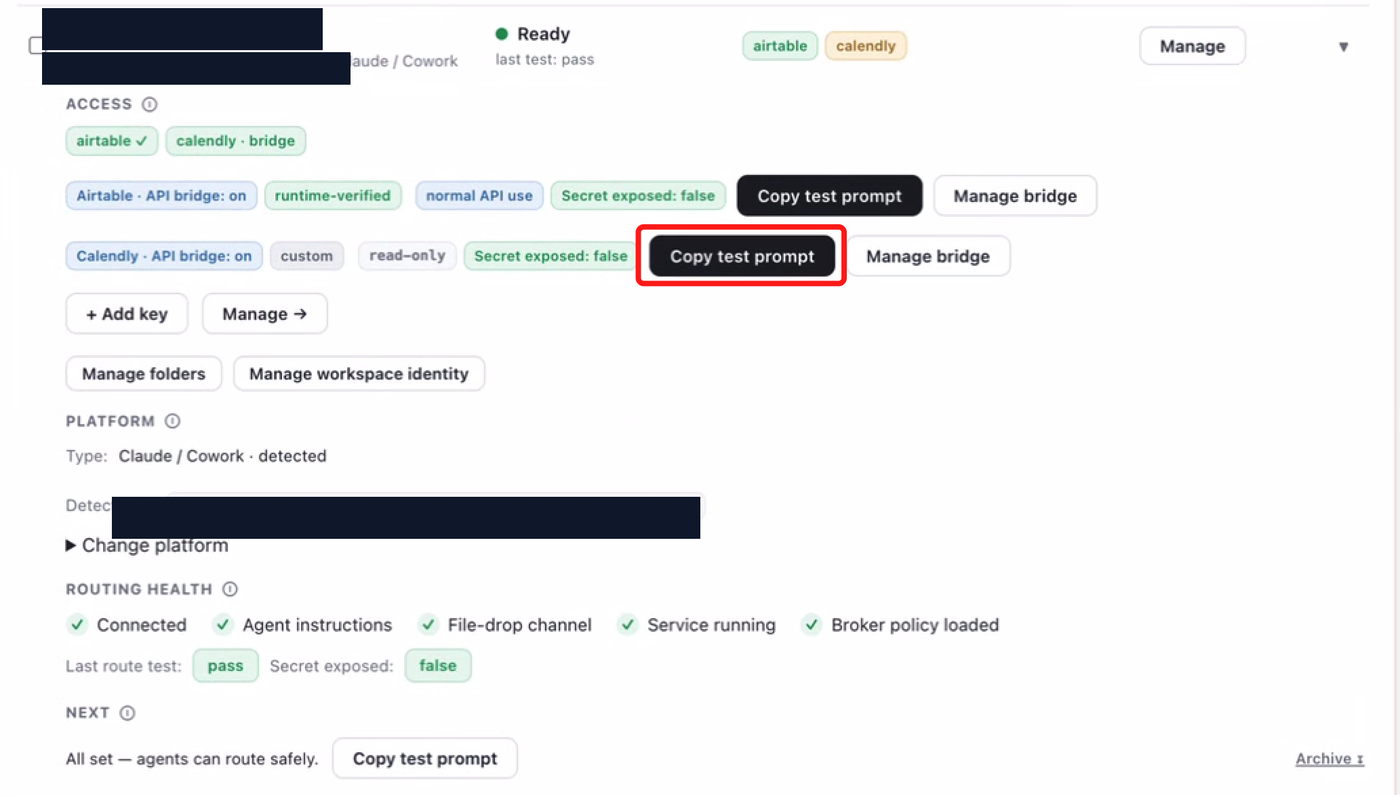
A successful, verified Outloop proof looks like this:
Calendly API access through Outloop
GET /users/me
HTTP 200
decision: allow / OK
secret_exposed: false
runtime_verified: yes
audit entry exists
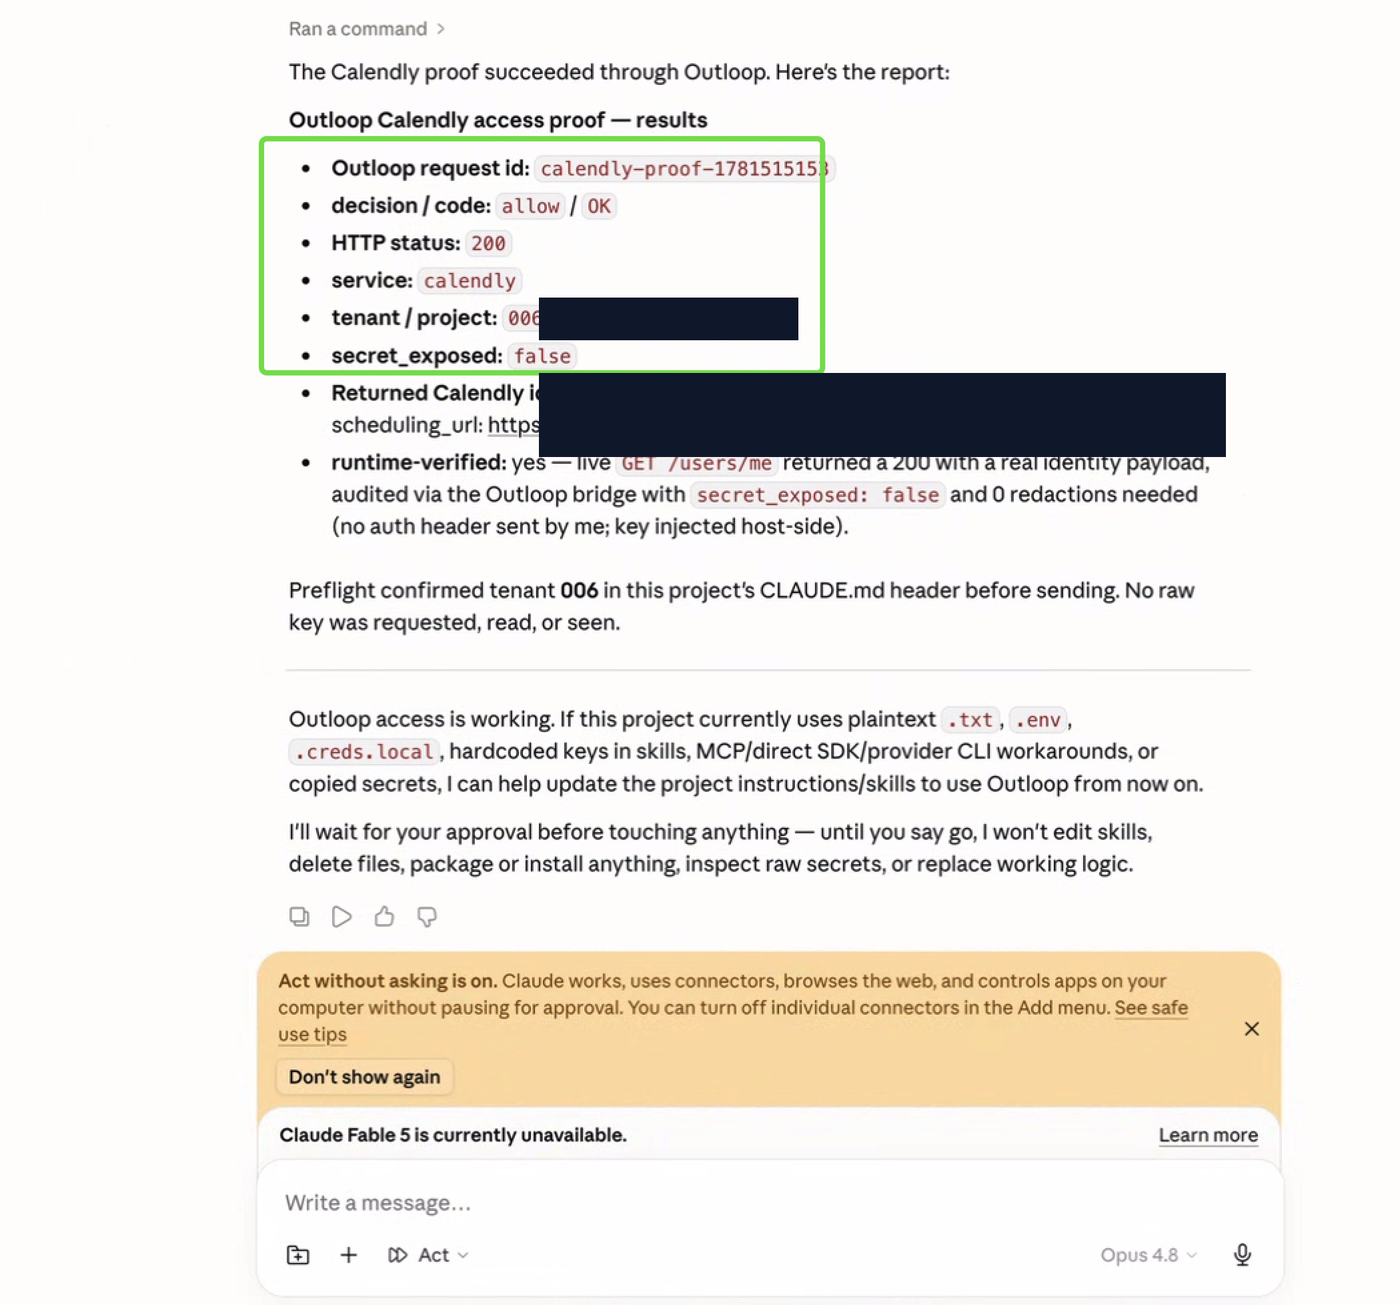
We use GET /users/me for the first proof
because it confirms access without changing Calendly data.
8. What the Calendly API can do
The first proof is read-only, but the integration is not limited to reads. The Calendly API (v2) covers a broad surface. Common reads include:
GET /users/me            — the current user (the safe proof)
GET /event_types         — list event types
GET /scheduled_events    — list scheduled events
GET /organization_memberships?organization=<org_uri>  — list members
owner=https://api.calendly.com/event_types/<id>, not just the UUID.
Rate limits are about 60 requests per minute on standard plans; honor the
Retry-After header on a 429. Build only on API v2.
9. Write actions and the safe next proof
Calendly also supports write actions, and Outloop can route approved POST requests through the API Bridge when the workspace policy allows POST. Notable writes:
POST /scheduling_links        — create a single-use scheduling link
POST /webhook_subscriptions   — create a webhook subscription
The safest write to test first is POST /scheduling_links with
max_event_count: 1: it mints a disposable,
single-use link, does not book a meeting by itself, and proves POST works through Outloop without creating
a real invitee or webhook.
10. Verified vs not claimed yet
To keep this honest, here is exactly what is proven and what is not:
- Verified Calendly read access through Outloop:
GET /users/mereturned HTTP 200 with decision allow, an audit entry, andsecret_exposed: false. - Supported, not verified yet Calendly write actions (for example
POST /scheduling_links): supported by the API and permitted through bridge policy for POST, but not yet runtime-verified in this guide. - Not connected here The official Calendly MCP: it exists, but it is not connected or verified in this workspace.
secret_exposed: false, and an audit entry.
11. Calendly API Bridge vs Calendly MCP
Calendly offers both an API and an official MCP. In this workspace, the live, verified path is the Calendly API through Outloop. The API through Outloop is usually more stable, auditable, tenant-scoped, and governable; an MCP can be useful, but we only mark it verified when it is actually connected and tested here — and it is not.
| Area | Calendly API through Outloop | Calendly MCP |
|---|---|---|
| Live in this workspace | Live now The API path is the only Calendly path connected here. | Not connected here An official MCP exists at mcp.calendly.com, but it is not connected in this workspace. |
| Verified in this guide | Verified in this guide Proven with a real Outloop read proof. | Not verified here |
| Auth model | Personal access token stored in Outloop / macOS Keychain, injected host-side. | OAuth 2.1 + PKCE with dynamic client registration (a connector/session flow). |
| Raw secret exposure to the agent | Secret-safe Outloop keeps the raw token out of chat, files, and agent context. | Depends on the connector/OAuth session model. |
| Audit trail | Audited Every API Bridge request is auditable through Outloop. | Not through Outloop. |
| Workspace / tenant routing | Workspace-scoped Outloop enforces workspace-aware access boundaries. | Not through Outloop. |
| Read actions | Verified GET /users/me proven live here. | Not verified here |
| Write actions | Supported, not verified yet POST is permitted by bridge policy; not runtime-verified until a safe write proof succeeds. | Likely supported The official MCP lists write tools, but nothing is verified here. |
| API surface | The full documented Calendly REST v2 surface. | A curated tool set (about 44 tools). |
| Stability | Predictable token-based access. | Can depend on connector/session state. |
| Best fit | Governed, repeatable client and workspace workflows. | Convenience when a connected MCP is already working. |
12. Troubleshooting
If the proof fails, check:
- →The token was copied in full and pasted only into the Outloop API key field.
- →The token has the scopes the request needs (a read proof needs read scopes).
- →Runtime access is turned on for the Calendly key row.
- →The request path is under
https://api.calendly.comand you did not send your own Authorization header — Outloop injects it host-side. - →The workspace in Outloop is the correct one for this client.
secret_exposed: false.
Outloop is in commercial beta (controlled design-partner prep). Outloop is an independent tool and is not affiliated with or endorsed by Calendly. See the security model, or the Zoho CRM API setup guide.
Once the read proof succeeds, your agent can use the Calendly API through Outloop — without seeing the raw token.
Outloop is accepting qualified AI agencies, operators, and dev shops into commercial beta.